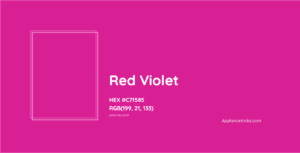
How to make Red Violet ? Mix red and violet paint together in equal parts to make red violet. Blend thoroughly until the desired hue is achieved.
Creating red violet is a simple process involving mixing red and violet paint until you reach the perfect shade. This vibrant color is popular among artists for its bold and eye-catching presence on a canvas. Whether you are a beginner or an experienced artist, mastering the art of creating red violet will add depth and dimension to your artwork.
This guide will explore the steps to seamlessly blend these two colors to create a stunning red-violet hue for your next masterpiece. Let’s dive into the world of color mixing and unleash your creativity with red-violet.
Gathering Ingredients And Materials
You need the right ingredients and materials to make a beautiful red-violet shade. Let’s start by gathering everything you need.
List Of Ingredients
- Fresh red raspberries
- Purple grape juice
- Cornstarch
List Of Materials
- Saucepan
- Strainer
- Bowl
Preparing The Dye
Precise measurements and ratios are crucial to achieving the perfect shade of red-violet dye. Use a digital scale to measure ingredients accurately.
- Gather all the necessary materials: red and violet dye powders, a mixing bowl, a whisk, and a measuring spoon.
- Start by measuring the appropriate amounts of red and violet dye powders based on the desired shade intensity.
- In a clean mixing bowl, combine the red and violet dye powders using a whisk until the mixture is uniform.
- Ensure the dye mixture is clump-free and well-blended to achieve a consistent color outcome.
Remember to wear gloves during mixing to avoid staining your hands with the vibrant red-violet dye.
 How to Make Red Violet
Preparing The Fabric
Before dyeing your fabric with red-violet, it’s essential to prepare it properly to ensure the best results. This involves two main steps: choosing the fabric and pre-washing it. Read on to learn more about each of these steps.
Choosing The Fabric
When it comes to dyeing fabric, the material you choose is crucial. Different fabrics absorb dyes differently, so selecting the right one to give your color vibrancy and longevity is essential.
Here are a few fabric options that work well with red violet dye:
- Cotton: Known for its absorbency and ease of dyeing, cotton is a popular choice for fabric dyeing projects.
- Silk: With its luxurious feel and smooth texture, silk can beautifully showcase the rich tones of red violet dye.
- Rayon: This fabric blends well with dyes and offers a soft and comfortable finish.
When choosing your fabric, consider the type of project you’re working on and the desired look and feel. Keep in mind that natural fabrics tend to absorb dyes better than synthetic ones.
Pre-washing The Fabric
Before diving into the dyeing process, it’s crucial to pre-wash your fabric. Pre-washing serves multiple purposes:
- Removes any chemicals or finishes that may hinder the absorption of the dye.
- Prevents unwanted shrinkage of the fabric after dyeing.
- Reduces the risk of color bleeding or fading post-dyeing.
To pre-wash your fabric, follow these simple steps:
- Fill a sink or a basin with lukewarm water.
- Add a small amount of mild detergent, ensuring it suits your fabric type.
- Place the fabric in the soapy water and gently agitate it for a few minutes.
- Rinse the fabric thoroughly with cool water to remove any soap residue.
- Wring out excess water and hang the fabric to dry or tumble dry on a low heat setting.
Pre-washing your fabric ensures a clean, absorbent surface on which the dye can penetrate evenly and create vibrant red-violet hues.
 How to Make Red Violet
Dyeing Process
The dyeing process for creating red violet involves a series of steps to achieve the desired color on the fabric or material. Understanding the dyeing process is crucial to ensure the color is vibrant and long-lasting.
Preparing The Dye Bath
Before beginning the dyeing process, it is essential to prepare the dye bath. This involves mixing the dye, water, and any necessary chemical fixatives to create a solution that will effectively bond with the fabric. The correct ratio of dye to water is crucial to achieve the desired color intensity.
Dyeing Technique
Once the dye bath is prepared, the fabric is immersed in the solution and agitated to ensure even color absorption. The time the fabric spends in the dye bath and the bath’s temperature are also critical factors that impact the final color result. After dyeing, the fabric is rinsed thoroughly to remove excess dye and then dried according to the material’s care instructions.
Rinsing And Finishing
After successfully dyeing your fabric to achieve a vibrant red-violet color, the final steps of rinsing and finishing are crucial to ensure the color sets in properly and the fabric retains its beautiful hue. Proper rinsing and setting the color will not only enhance the durability of the dye but also prevent any potential color bleeding when washed in the future.
Rinsing The Fabric
Once the fabric has absorbed the dye, rinsing it is essential to remove any excess dye that has not bonded with the fabric. Begin gently washing the fabric under cold water to eliminate unabsorbed dye. Gradually increase the water temperature, ensuring it doesn’t exceed 30°C until the water runs clear. This indicates that the excess dye has been removed. Gently squeeze the fabric to remove excess water, but avoid wringing to prevent damage to the fibers or potential color distortion.
Setting The Color
Setting the color after rinsing is crucial to ensure the red-violet dye bonds firmly with the fabric. One effective method for setting the color is to steam the fabric. Place the rinsed fabric in a steamer or tightly sealed pot above simmering water for about 30 minutes. This process allows the dye molecules to penetrate and bond with the fibers fully. After steaming, allow the fabric to cool before washing it with a gentle pH-neutral detergent to remove any remaining dye particles. Finally, dry the fabric away from direct sunlight to avoid any potential fading of the vibrant red-violet color.
Drying And Caring For The Fabric
Once you have successfully dyed your fabric to the beautiful red-violet shade you desire, it is essential to know how to dry and care for it to maintain its vibrancy properly. Here are some critical tips to follow:
Drying The Fabric
When drying your red violet fabric, it is crucial to avoid direct sunlight, as it can cause the color to fade over time. Instead, opt for drying your fabric in a shaded area or indoors, where it is protected from harmful UV rays.
If you’re using a dryer, set it on a low heat setting to prevent any unnecessary damage to the fabric. Air-drying is usually the safest option as it helps preserve the fabric’s color and integrity for extended periods.
Caring Tips
To ensure your red violet fabric stays looking its best, follow these caring tips:
- Wash the fabric separately: To prevent any color bleeding, it is essential to wash your red violet fabric separately from other garments. This will help preserve the color and avoid any undesired stains.
- Use gentle detergent: When washing your fabric, select a gentle detergent formulated for colored fabrics. Harsh chemicals can strip the color from the fabric.
- Wash in cold water: Always use cold water when washing your red-violet fabric. Hot water can cause the color to fade and lose its vibrancy.
- Avoid harsh scrubbing: Avoid using abrasive scrubbing techniques when handwashing your fabric. Instead, gently massage the fabric to remove any dirt or stains.
- Avoid ironing directly: Ironing your red-violet fabric can cause the color to fade or burn. Place a clean cloth or towel over the fabric before ironing it to avoid this.
By following these drying and caring tips, you can ensure that your red violet fabric remains vibrant and beautiful for a long time. Taking proper care of your fabric will maintain its appearance and extend its lifespan.
 How to Make Red Violet
Frequently Asked Questions Of How To Make Red Violet
How to make red violet?
You can create a red-violet color by mixing red and blue paint. Start with a base of red and gradually add small amounts of blue until you achieve the desired shade of red violet. Experiment with different ratios to find the perfect hue for your project.
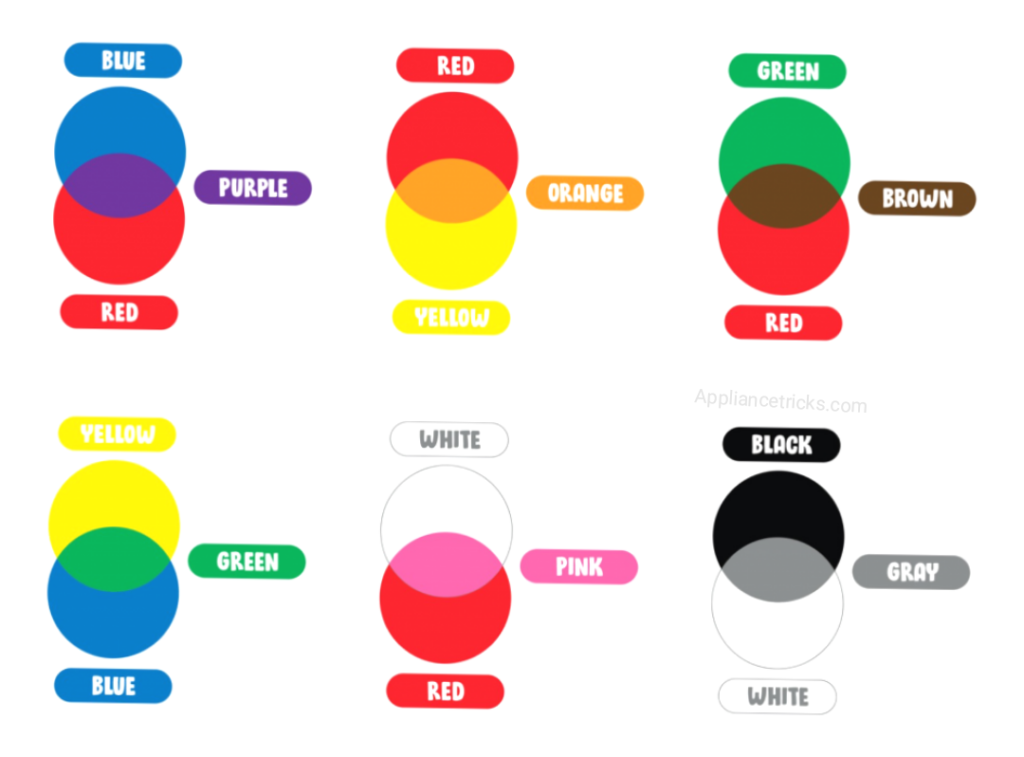
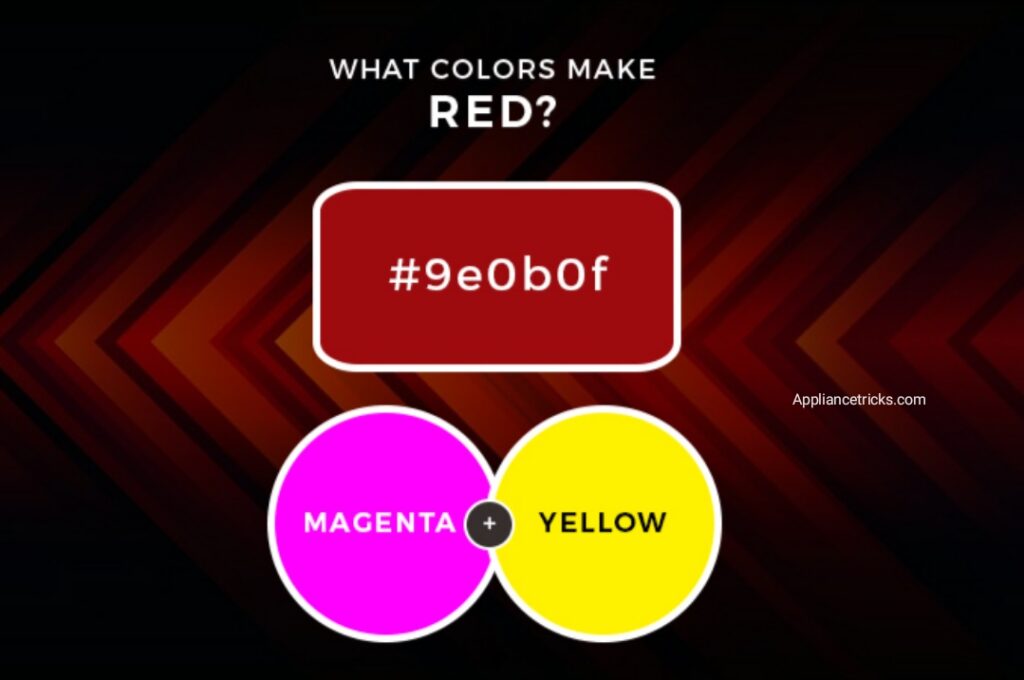
What Two Colors Make Red?
The primary colors that make red are magenta and yellow. When mixed in equal proportions, they produce the vibrant red color many people are familiar with. Understanding the concept of primary colors is essential in creating various hues and shades.
Can I Mix Red And Purple To Make Red Violet?
Yes, you can mix red and purple to create red-violet. Start with a base of red and gradually add small amounts of purple until you achieve the desired shade of red violet. Try different combinations and proportions to find the perfect balance of red and purple for your project.
Conclusion
Creating the vibrant color red violet is an accessible and exciting process. By combining red and violet pigments in various proportions, you can achieve a range of beautiful shades. Experiment with different ratios and hues to find the perfect tone for your needs.
Whether you’re an artist, interior decorator, or simply someone looking to make a bold statement, making red violet is a skill worth exploring. Happy coloring!
#how to make red violet #how to make red violet #how to make red violet #how to make red violet #how to make red violet #how to make red violet #how to make red violet #how to make red violet #how to make red violet #how to make red violet #how to make red violet #how to make red violet